Continue to doctor my Pre 2
First of all, went over to HP Palm Profile and sign-in using my Profile.

Upon signing-in, it will show me my Profile with my handset detail:

I then moved on to select "Get webOS Doctor" which leads me to Get webOS Doctor. You will need to have Java 1.5 or later. Click on "Continue" to proceed with downloading of webOS wrapper (webosdoctorp103ueuna-wr.jnlp) which in turn will download webosdoctorp103ueuna-wr.jar. I have decided to download the ROM myself through webOS-Internal. Locate your own ROM as mine is an Unlocked Pre 2 for Europe network. Make sure you are downloading the latest version which is version 2.1.0.

Once downloaded webosdoctorp103ueuna-wr.jar (Pre 2.1.0 ROM for Unlocked UMTS/GSM), you will need to remove the original battery from Pre 2. If you are using a non-original battery, unfortunately, you must change it back to the original battery. I suspect that this is a precaution from HP so that those dodgy battery will not damage your Pre 2.
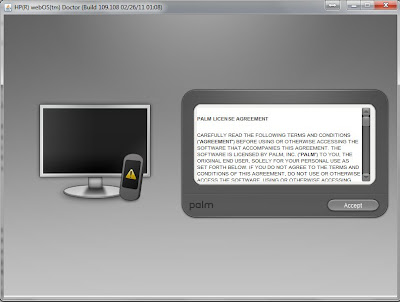
Run the .jar file and you will see the following. Select your Country, Language and Accept Licence Agreement


There is a slight bug in this installer whereby "Next" maybe enabled upon reaching this screen. No worries, let it fail.


At this point, make sure you do not have the original battery in Pre 2. Press and Hold the Volume Up rocker and connect the USB cable. You will see the following in your Pre 2:

You will then see webOS Doctor will enable the "Next" button.

At this point, you will see webOS Doctor is writing to your Pre 2 and you will see something like a big arrow going into a ROM.


Finally, you will see the following signalling an end to doctoring your Pre 2.

Your Pre 2 will then reboot and come out with a screen asking for Country and Language. In my case, I have selected "English" and "United Kingdom". Next, you will see the "Terms & Conditions for Palm webOS Services" which you will need to click on "Accept".
You will be prompted the following options under the Palm Profile:
- Sign In To My Profile
- Create New Profile
- Tell Me More (more like a Help screen)
I have tried "Sign In To My Profile" couple of times, unfortunately, I am not able to sign-in which I may need to ask HP to reset my Profile.
Anyway, for the sake of documenting my experience, I am selecting "Sign In To My Profile". Entered my Email Address and Password. Clicked "Sign-In" and wait for it to connect to internet. It is best that you have enabled data connection for this otherwise you may end up paying heaps for this. You will see "Signing In..." and the scrum will be scrolling.
In my case, I have "Sign-In Failed". It says, "This may be due to low network coverage or the phone settings on your SIM card need to be entered manually". You are given 2 buttons - "Try Again" and "Enter Phone Settings". I have chosen "Enter Phone Settings" and entered my phone provider preferences. I have entered my provider's Internet APN. You may also need to enter the "Username" and "Password" should your provider needs them. Click on "Change Settings" button. It will try to connect and sign-in once more.
Next, since my Profile already exists, I have the following message - "Profile Already Active". It says, "You're already signed in to a Palm profile with email address .... on another phone. Before continuing sign-in, copy any data you wish to keep from the other phone's USB drive to your computer. Make sure the data is backed up by selecting Back up Now from the Back-up preference. You are given 2 buttons - "Back" and "Finish Sign-in". In my case, since I am doctoring it, I don't care of backing up anymore., so selected "Finish Sign-In" button. It will try to connect and sign-in once more.
Next, I have this error message - "Data Not Restored". It further says, "We were unable to restore your data. Please wait a few minutes and try again. If you need help, visit palm.com/support.". You will see the "Try Again" button. In my case, I have clicked on the "Try Again" button to give it another shot.
It brings me back to the original "Sign-In" screen prompting for my "Email Address" and "Password. Since the logon information is correct, I have clicked on "Sign-In" button instead of the "Forgot Password" button. It will try to connect and sign-in once more. Unfortunately, mine didn't and went back to "Data Not Restored".
Look for my next action in the next blog.

Upon signing-in, it will show me my Profile with my handset detail:

I then moved on to select "Get webOS Doctor" which leads me to Get webOS Doctor. You will need to have Java 1.5 or later. Click on "Continue" to proceed with downloading of webOS wrapper (webosdoctorp103ueuna-wr.jnlp) which in turn will download webosdoctorp103ueuna-wr.jar. I have decided to download the ROM myself through webOS-Internal. Locate your own ROM as mine is an Unlocked Pre 2 for Europe network. Make sure you are downloading the latest version which is version 2.1.0.

Once downloaded webosdoctorp103ueuna-wr.jar (Pre 2.1.0 ROM for Unlocked UMTS/GSM), you will need to remove the original battery from Pre 2. If you are using a non-original battery, unfortunately, you must change it back to the original battery. I suspect that this is a precaution from HP so that those dodgy battery will not damage your Pre 2.
Run the .jar file and you will see the following. Select your Country, Language and Accept Licence Agreement


There is a slight bug in this installer whereby "Next" maybe enabled upon reaching this screen. No worries, let it fail.


At this point, make sure you do not have the original battery in Pre 2. Press and Hold the Volume Up rocker and connect the USB cable. You will see the following in your Pre 2:

You will then see webOS Doctor will enable the "Next" button.

At this point, you will see webOS Doctor is writing to your Pre 2 and you will see something like a big arrow going into a ROM.


Finally, you will see the following signalling an end to doctoring your Pre 2.

Your Pre 2 will then reboot and come out with a screen asking for Country and Language. In my case, I have selected "English" and "United Kingdom". Next, you will see the "Terms & Conditions for Palm webOS Services" which you will need to click on "Accept".
You will be prompted the following options under the Palm Profile:
- Sign In To My Profile
- Create New Profile
- Tell Me More (more like a Help screen)
I have tried "Sign In To My Profile" couple of times, unfortunately, I am not able to sign-in which I may need to ask HP to reset my Profile.
Anyway, for the sake of documenting my experience, I am selecting "Sign In To My Profile". Entered my Email Address and Password. Clicked "Sign-In" and wait for it to connect to internet. It is best that you have enabled data connection for this otherwise you may end up paying heaps for this. You will see "Signing In..." and the scrum will be scrolling.
In my case, I have "Sign-In Failed". It says, "This may be due to low network coverage or the phone settings on your SIM card need to be entered manually". You are given 2 buttons - "Try Again" and "Enter Phone Settings". I have chosen "Enter Phone Settings" and entered my phone provider preferences. I have entered my provider's Internet APN. You may also need to enter the "Username" and "Password" should your provider needs them. Click on "Change Settings" button. It will try to connect and sign-in once more.
Next, since my Profile already exists, I have the following message - "Profile Already Active". It says, "You're already signed in to a Palm profile with email address .... on another phone. Before continuing sign-in, copy any data you wish to keep from the other phone's USB drive to your computer. Make sure the data is backed up by selecting Back up Now from the Back-up preference. You are given 2 buttons - "Back" and "Finish Sign-in". In my case, since I am doctoring it, I don't care of backing up anymore., so selected "Finish Sign-In" button. It will try to connect and sign-in once more.
Next, I have this error message - "Data Not Restored". It further says, "We were unable to restore your data. Please wait a few minutes and try again. If you need help, visit palm.com/support.". You will see the "Try Again" button. In my case, I have clicked on the "Try Again" button to give it another shot.
It brings me back to the original "Sign-In" screen prompting for my "Email Address" and "Password. Since the logon information is correct, I have clicked on "Sign-In" button instead of the "Forgot Password" button. It will try to connect and sign-in once more. Unfortunately, mine didn't and went back to "Data Not Restored".
Look for my next action in the next blog.


Comments
Post a Comment